Deploy smart contracts
We strongly encourage developers to utilise our contract presets.

contracts
This is because these contracts:
- Have been battle-tested in production
- Implement features mandatory for all Immutable zkEVM contracts
- Contain advanced features that are useful for the majority of NFT projects
Immutable zkEVM collection requirements
All collections deployed on Immutable's zkEVM must utilise the operator allowlist to protect content creator (eg: you, the game studio's) royalty fees and Immutable's 2% protocol fees.
This can be achieved through embedding the following into your smart contract collection designs:
Recommended Approach
For seamless implementation use or inherit Immutable's preset contracts tailored for gas-efficient creation of Web3 gaming assets on the zkEVM network. Immutable offers the following 3 preset contracts:
- Recommended Presets for Web3 Games:
- ImmutableERC721.sol - Multiple batch minting functions for optimised gas efficiency. Compatible with Minting API. Multiple batch minting functions for offering gas efficiencies for different Web3 gaming use cases.
- ImmutableERC1155.sol. Semi-fungible tokens. Compatible with Minting API.
- Alternative Presets:
- ImmutableERC721MintByID.sol. Single batch minting function requiring game studio to specify token_id at time of mint. Optimised for gas, yet less gas efficient than ImmutableERC721.sol. Compatible with Minting API.
Minimally Required Standard
If the above options are not compatible with your game design, it is mandatory for your collection to inherit the OperatorAllowlistEnforced.sol contract and adding necessary overrides to approve and transfer functions, allowing your collection to interact with the OperatorAllowlist. OperatorAllowlistEnforced includes the modifier functions to identify compliant smart contracts for approvals and transfers, ensuring the preservation of content creators’ royalty fees and protocol fees in third-party marketplace transactions.
- If your game design restricts your collections from importing Immutable's preset contracts, please note that your request for inclusion on the Mainnet's deployer allowlist may undergo additional processing time. Immutable will conduct thorough verification to ensure that your collections comply with our mandated standards, safeguarding content creators on the network. Thank you for your understanding and cooperation in ensuring Immutable's zkEVM network remains secure for our web3 gaming community.
Example contracts using OpenZeppelin's ERC721 and ERC1155 standards with the OperatorAllowlistEnforced contract are provided below:
- ERC721
- ERC721 Upgradable
- ERC1155
- ERC1155 Upgradable
Below is an example ClashOfCatsERC721 contract that inherits our OperatorAllowlistEnforced:
// SPDX-License-Identifier: UNLICENSED
pragma solidity 0.8.19;

import '@openzeppelin/contracts/token/ERC721/ERC721.sol';
import {Ownable} from '@openzeppelin/contracts/access/Ownable.sol';
import {OperatorAllowlistEnforced} from '@imtbl/contracts/contracts/allowlist/OperatorAllowlistEnforced.sol';

contract ClashOfCatsERC721 is ERC721, Ownable, OperatorAllowlistEnforced {
  constructor(
    string memory name,
    string memory symbol,
    address operatorAllowlist_
  ) ERC721(name, symbol) Ownable() {
    // OAL address is set in the constructor
    _setOperatorAllowlistRegistry(operatorAllowlist_);
  }

  // Overrides _approve function to include `validateApproval` modifier for OAL
  function _approve(
    address to,
    uint256 tokenId
  ) internal override(ERC721) validateApproval(to) {
    super._approve(to, tokenId);
  }

  // Overrides setApprovalForAll function to include `validateApproval` modifier for OAL
  function setApprovalForAll(
    address operator,
    bool approved
  ) public override(ERC721) validateApproval(operator) {
    super.setApprovalForAll(operator, approved);
  }

  // Overrides _transfer function to include `validateTransfer` modifier for OAL
  function _transfer(
    address from,
    address to,
    uint256 tokenId
  ) internal override(ERC721) validateTransfer(from, to) {
    super._transfer(from, to, tokenId);
  }
}
Below is an example ClashOfCatsERC721Upgradable contract that inherits our OperatorAllowlistEnforced:
pragma solidity 0.8.19;

import '@openzeppelin/contracts-upgradeable/token/ERC721/ERC721Upgradeable.sol';
import {Ownable} from '@openzeppelin/contracts/access/Ownable.sol';
import {OperatorAllowlistEnforced} from '@imtbl/contracts/contracts/allowlist/OperatorAllowlistEnforced.sol';

contract ClashOfCatsERC721Upgradable is
  ERC721Upgradeable,
  OperatorAllowlistEnforced
{
  function initialize(
    string memory name_,
    string memory symbol_,
    address operatorAllowlist_
  ) public initializer {
    __ERC721_init(name_, symbol_);
    // OAL address is set in the constructor
    _setOperatorAllowlistRegistry(operatorAllowlist_);
  }

  // Overrides approve function to include `validateApproval` modifier for OAL
  function approve(
    address to,
    uint256 tokenId
  ) public virtual override(ERC721Upgradeable) validateApproval(to) {
    super.approve(to, tokenId);
  }

  // Overrides setApprovalForAll function to include `validateApproval` modifier for OAL
  function setApprovalForAll(
    address operator,
    bool approved
  ) public virtual override(ERC721Upgradeable) validateApproval(operator) {
    super.setApprovalForAll(operator, approved);
  }

  // Overrides _safeTransfer function to include `validateTransfer` modifier for OAL
  function _safeTransfer(
    address from,
    address to,
    uint256 tokenId,
    bytes memory _data
  ) internal virtual override(ERC721Upgradeable) validateTransfer(from, to) {
    super._safeTransfer(from, to, tokenId, _data);
  }

  // Overrides transferFrom function to include `validateTransfer` modifier for OAL
  function transferFrom(
    address from,
    address to,
    uint256 tokenId
  ) public virtual override(ERC721Upgradeable) validateTransfer(from, to) {
    super.transferFrom(from, to, tokenId);
  }
}
Below is an example ClashOfCatsERC1155 contract that inherits our OperatorAllowlistEnforced:
// SPDX-License-Identifier: UNLICENSED
pragma solidity 0.8.19;

import '@openzeppelin/contracts/token/ERC1155/ERC1155.sol';
import {Ownable} from '@openzeppelin/contracts/access/Ownable.sol';
import {OperatorAllowlistEnforced} from '@imtbl/contracts/contracts/allowlist/OperatorAllowlistEnforced.sol';

contract ClashOfCatsERC1155 is ERC1155, Ownable, OperatorAllowlistEnforced {
  constructor(
    string memory baseTokenURI,
    address operatorAllowlist_
  ) ERC1155(baseTokenURI) Ownable() {
    // OAL address is set in the constructor
    _setOperatorAllowlistRegistry(operatorAllowlist_);
  }

  // Overrides _safeTransferFrom function to include `validateTransfer` modifier for OAL
  function _safeTransferFrom(
    address from,
    address to,
    uint256 id,
    uint256 value,
    bytes memory data
  ) internal override validateTransfer(from, to) {
    super._safeTransferFrom(from, to, id, value, data);
  }

  // Overrides _safeBatchTransferFrom function to include `validateTransfer` modifier for OAL
  function _safeBatchTransferFrom(
    address from,
    address to,
    uint256[] memory ids,
    uint256[] memory values,
    bytes memory data
  ) internal override validateTransfer(from, to) {
    super._safeBatchTransferFrom(from, to, ids, values, data);
  }

  // Overrides setApprovalForAll function to include `validateApproval` modifier for OAL
  function setApprovalForAll(
    address operator,
    bool approved
  ) public override(ERC1155) validateApproval(operator) {
    super.setApprovalForAll(operator, approved);
  }
}
Below is an example ClashOfCatsERC1155Upgradable contract that inherits our OperatorAllowlistEnforced:
// SPDX-License-Identifier: UNLICENSED
pragma solidity 0.8.19;

import '@openzeppelin/contracts-upgradeable/token/ERC1155/ERC1155Upgradeable.sol';
import {Ownable} from '@openzeppelin/contracts/access/Ownable.sol';
import {OperatorAllowlistEnforced} from './OperatorAllowlistEnforced.sol';

contract ClashOfCatsERC1155Upgradable is
  ERC1155Upgradeable,
  OperatorAllowlistEnforced
{
  function initialize(
    string memory uri_,
    address operatorAllowlist_
  ) public initializer {
    __ERC1155_init(uri_);
     // OAL address is set in the constructor
    _setOperatorAllowlistRegistry(operatorAllowlist_);
  }

  // Overrides _safeTransferFrom function to include `validateTransfer` modifier for OAL
  function _safeTransferFrom(
    address from,
    address to,
    uint256 id,
    uint256 value,
    bytes memory data
  ) internal override(ERC1155Upgradeable) validateTransfer(from, to) {
    super._safeTransferFrom(from, to, id, value, data);
  }

  // Overrides _safeBatchTransferFrom function to include `validateTransfer` modifier for OAL
  function _safeBatchTransferFrom(
    address from,
    address to,
    uint256[] memory ids,
    uint256[] memory values,
    bytes memory data
  ) internal override(ERC1155Upgradeable) validateTransfer(from, to) {
    super._safeBatchTransferFrom(from, to, ids, values, data);
  }

  // Overrides setApprovalForAll function to include `validateApproval` modifier for OAL
  function setApprovalForAll(
    address operator,
    bool approved
  ) public override(ERC1155Upgradeable) validateApproval(operator) {
    super.setApprovalForAll(operator, approved);
  }
}
Here is a simple collection operator allowlist checklist you should follow to ensure your game has no delays at launch:
- Have you imported
OperatorAllowlistEnforced.sol? - Have you implemented the allowlist check on transfers?
- Have you implemented the allowlist check on approvals?
The use of the preset contracts accelerates integration with Immutable's ecosystem. If your studio has developed custom ERC721 or ERC1155 collections, ensure they adhere to their respective standards in addition to inheriting the OperatorAllowlistEnforced.sol contract, to safeguard compatibility with Immutable's ecosystem.
Configure Hardhat
To deploy your new smart contract to the Immutable zkEVM Testnet using Hardhat, you first have to configure the network in the hardhat.config.js/ts file. Add the immutableZkevmTestnet network configuration object to the networks array, with the url property set provider network URL.
You can also add an array of accounts (defined by their private key) for the corresponding network to be used by the provider. Note that the account will have to have enough native token funds, this will be tIMX if you're interacting with the Immutable zkEVM Testnet. This balance is to cover the contract deployment costs on the network.
The above example assumes you have configured your project to contain an .env file containing the PRIVATE_KEY variable.
Example hardhat network configuration below (Note: We have added immutableZkevmMainnet configuration for your convenience):
import { HardhatUserConfig } from "hardhat/config";
import "@nomicfoundation/hardhat-toolbox";
import '@typechain/hardhat';

import * as dotenv from 'dotenv';

dotenv.config();

const config: HardhatUserConfig = {
  solidity: {
    version: "0.8.19",
    settings: {
      optimizer: {
        enabled: true,
        runs: 200,
      },
    },
  },
  networks: {
    immutableZkevmTestnet: {
      url: "https://rpc.testnet.immutable.com",
      accounts: process.env.OWNER_PRIVATE_KEY ? [process.env.OWNER_PRIVATE_KEY] : [],
    },
    immutableZkevmMainnet: {
      url: "https://rpc.immutable.com",
      accounts: process.env.OWNER_PRIVATE_KEY ? [process.env.OWNER_PRIVATE_KEY] : [],
    },
  },
};

export default config;
Add contract
After installing the preset contract library you can add a preset contract to your project by creating a new directory called contracts and create a file inside the directory called, for example, MyContract.sol.
You can view the entire list of presets along with a more detailed explanation for each of them here.
- ImmutableERC721 Preset
- ImmutableERC1155 Preset
Below is an example contract that inherits our ImmutableERC721 preset:
pragma solidity ^0.8.19;

import "@imtbl/contracts/contracts/token/erc721/preset/ImmutableERC721.sol";

contract MyContract is ImmutableERC721 {
    constructor(
        address owner,
        string memory name,
        string memory symbol,
        string memory baseURI,
        string memory contractURI,
        address operatorAllowlist,
        address royaltyReceiver,
        uint96 feeNumerator

    )
        ImmutableERC721(
            owner,
            name,
            symbol,
            baseURI,
            contractURI,
            operatorAllowlist,
            royaltyReceiver,
            feeNumerator
        )
    {
      // your additional contract logic goes here
    }
}
Below is an example contract that inherits our ImmutableERC1155 preset:
pragma solidity ^0.8.19;

import "@imtbl/contracts/contracts/token/erc1155/preset/ImmutableERC1155.sol";

contract MyContract is ImmutableERC1155 {
    constructor(
        address owner,
        string memory name,
        string memory baseURI,
        string memory contractURI,
        address operatorAllowlist,
        address receiver,
        uint96 feeNumerator

    )
        ImmutableERC1155(
            owner,
            name,
            baseURI,
            contractURI,
            operatorAllowlist,
            receiver,
            feeNumerator
        )
    {
      // your additional contract logic goes here
    }
}
Below is an example contract that inherits our ImmutableERC721 preset:
The above sample code uses solidity ^0.8.19.
Ensure your hardhat.config.ts file in your hardhat project has solidity set to version: "0.8.19".
The below table details the Operator Allow List values for the operatorAllowlist parameter:
| Chain Name | Chain ID | Operator Allowlist Address |
|---|---|---|
imtbl-zkevm-testnet | eip155:13473 | 0x6b969FD89dE634d8DE3271EbE97734FEFfcd58eE |
imtbl-zkevm-mainnet | eip155:13371 | 0x5F5EBa8133f68ea22D712b0926e2803E78D89221 |
Compile
Compiling a smart contract involves converting human-readable Solidity code into bytecode, making it executable on the blockchain. You will be deploying the contracts in the contracts folder.
We'll be compiling them with Hardhat:
$ npx hardhat compile

Compiling...
Compiled 1 contract successfully
This compilation process generates output files in the artifacts directory, which include the ABI (Application Binary Interface) files for each contract, as well as the bytecode and source maps.
You can also customise the Hardhat compiler in your hardhat config file (hardhat.config.js/ts). See the Hardhat documentation for more details.
Test
Write tests
Write unit and integration tests for your smart contract using the built-in testing framework provided by Hardhat (documentation here), based on Mocha and Chai. Test files should live in the /test folder, named MyContract.test.js for example. An example of a test case using Hardhat's built-in testing library would look like this:
describe('My contract', function () {
  it('should do something', async function () {
    const myContract = await ethers.getContract('MyContract');
    const result = await myContract.someFunction();
    assert.equal(
      result,
      expectedResult,
      'The result was not what was expected'
    );
  });
});
Run tests
To run all tests in the /test directory:
npx hardhat test
Or to run specific test files:
npx hardhat test test/my-tests.ts
Note: It's not necessary to run npx hardhat compile before running your tests as, by default, Hardhat automatically compiles your contracts before a test run.
- It's not necessary to run
npx hardhat compilebefore running your tests as, by default, Hardhat automatically compiles your contracts before a test run. - If the following error occurs when attempting to run the test script, please delete your
node_modulesfolder and yourpackage-lock.jsonfile and rerunnpm install. For more information on common Hardhat errors, refer here.Error HH18: You installed Hardhat with a corrupted lockfile due to the NPM bug #4828.
Deploy
Deploying your smart contract means adding it to the blockchain network, making it available for network users to interact with.
Write a deployment script
Click here for more information.
You can create a deployment script in a new file in the scripts directory, for example, deploy.ts. This script should include the necessary code to deploy the smart contract to the Immutable zkEVM Testnet using the deploy function provided by Hardhat.
- ImmutableERC721 Deploy Script
- ImmutableERC1155 Deploy Script
import { ethers } from "hardhat";
import {
    MyContract,
    MyContract__factory,
  } from "../typechain-types";

async function main() {
  // Load the contract and get the contract factory
  const transactionOverrides = {maxFeePerGas: 100000000000, maxPriorityFeePerGas: 100000000000, gasLimit: 10000000 }

  const [deployer] = await ethers.getSigners();
  console.log("Deploying contracts with the account:", deployer.address);
  const factory: MyContract__factory = await ethers.getContractFactory(
    "MyContract"
  );
  // Deploy the contract to the zkEVM network
    const contract: MyContract = await factory.connect(deployer).deploy(
      // add any necessary contract arguments here, if using Immutable's sample contracts the following would be applicable.
      // deployer.address,
      // "[NAME]" // name of collection
      // "[SYMBOL]" // collection symbol
      // "[BASEURI]" // token metadata URI
      // "[CONTRACTURI]",  // collection metadata URI
      // "[OPERATORALLOWLIST]", //operatorAllowlist address
      // deployer.address, // royalty recipient
      // ethers.BigNumber.from("2000"), // fee numerator
      // transactionOverrides
  );
  const deployedContract = await contract.waitForDeployment();
  console.log('Contract deployed to:', await deployedContract.getAddress());
}

main()
  .then(() => process.exit(0))
  .catch((error) => {
    console.error(error);
    process.exit(1);
  });
import { ethers } from "hardhat";
import {
    MyContract,
    MyContract__factory,
  } from "../typechain-types";

async function main() {
  const privateKey = ... // secure private keystore fetching
  const providerURL = process.env.RPC_URL // provider URL
  const royaltyReceiver = process.env.ROYALTY_RECEIVER // royalty receiver address
  const royaltyFeeNumerator = process.env.ROYALTY_FEE_NUMERATOR // royalty fee numerator

  const operatorAllowlist = '0x6b969FD89dE634d8DE3271EbE97734FEFfcd58eE' // testnet operatorAllowlist address

  const signer = new ethers.Wallet( privateKey [ , providerURL ] )

  // Load the contract and get the contract factory
  const transactionOverrides = {maxFeePerGas: 100000000000, maxPriorityFeePerGas: 100000000000, gasLimit: 10000000 }

  const [deployer] = await ethers.getSigners();
  console.log("Deploying contracts with the account:", deployer.address);
  const factory: MyContract__factory = await ethers.getContractFactory(
    "MyContract"
  );
  // Deploy the contract to the zkEVM network

    const contract: MyContract = await factory.connect(deployer).deploy(
      // add any necessary contract arguments here, if using Immutable's sample contracts the following would be applicable.
      // deployer.address,
      // "[NAME]" // name of collection
      // "[BASEURI]" // token metadata URI
      // "[CONTRACTURI]",  // collection metadata URI
      // "[OPERATORALLOWLIST]", //operatorAllowlist address
      // deployer.address, // royalty recipient
      // ethers.BigNumber.from("2000"), // fee numerator
      // transactionOverrides
  );
  const deployedContract = await contract.waitForDeployment();
  console.log('Contract deployed to:', await deployedContract.getAddress());
}

main()
  .then(() => process.exit(0))
  .catch((error) => {
    console.error(error);
    process.exit(1);
  });
Deploy the smart contract
Run your deployment script using the following command, using the --network tag to the zkEVM test network you have defined in the config:
# deploy to Immutable zkEVM Testnet
npx hardhat run --network immutableZkevmTestnet scripts/deploy.ts
Take note of the deployed contract address that is returned when the script executes successfully. See below for an example.
Contract deployed to: 0x96dBDB46eCeEFd7082AE6461A83A6f08C8F5cd1C
On Mainnet the following command would be used to deploy your contract: npx hardhat run --network immutableZkevmMainnet scripts/deploy.ts
Troubleshooting: UNPREDICTABLE_GAS_LIMIT error
Some of your transactions may fail, such as the transaction to deploy your contract. A common error is an unpredictable gas limit which is thrown when either the transaction will revert, or the gas limit set on your transaction is incorrect:
ERROR:
    reason: 'cannot estimate gas; transaction may fail or may require manual gas limit',
    code: 'UNPREDICTABLE_GAS_LIMIT',
    error: Error: gas required exceeds allowance (<your allowance>) or always failing transaction
A transaction will revert if there is an error in the logic of the contract, for example, incorrect function arguments supplied. Ensure that your deployment parameters/inputs are correctly set, leveraging the local hardhat environment, e.g. test scripts with local deployments.
Transactions require a gas limit to set an upper bound on the gas used. If this limit is below the expected gas needed for the transaction, this error will be thrown. Try increasing the gas limit to fix this as below:
const contract = await MyContract.deploy({gasLimit: <your desired increased gas limit>});
For further debugging, you can estimate the gas of your transaction using the method shown here - which will provide a lower bound of the gas requirements.
Link collection to your Immutable Hub account
Once the collection has been deployed you will need to link it to your Immutable Hub account to perform certain actions, such as metadata refresh.
- Follow our Hub project setup tutorial to set up a project on zkEVM.
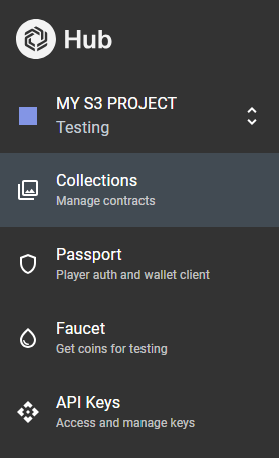
- Go to the Collections section in your project, which can be navigated to via the left hand side of the page.
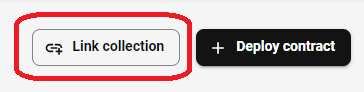
- Click on the "Link Collection" button in the top right hand corner.
- Enter the collection address of your deployed contract in the prompt and push "Preview".
- Review the details of the collection you are linking and push the "Link" button.
- Sign the transaction from your wallet to prove that you own the collection you are linking your Immutable Hub account to.
The wallet connected to your Immutable Hub account must be the deployer wallet of your deployed collection for verification purposes.
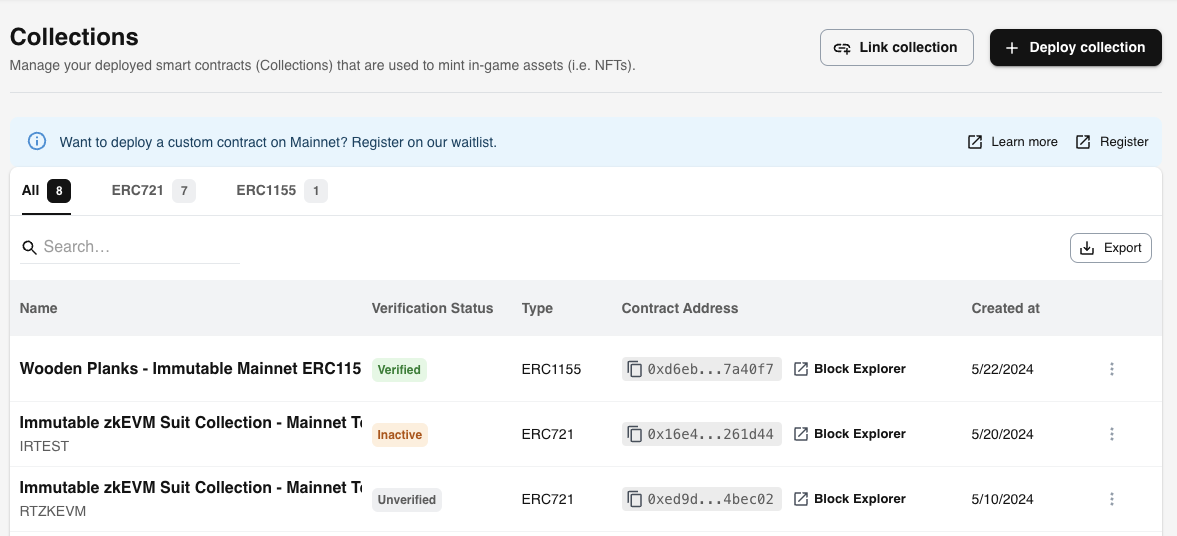
Once the collection address has been linked to your Immutable Hub account, it will be visible in your collections list.
Minting API Minter Role
If your ERC721 or ERC1155 collection requires Minting API support, please follow the guide to grant the Minting API smart contract the approved minter role for your collection.
Please note that the Minting API has been rigorously tested with Immutable's preset contracts. If you are using a custom contract, Immutable provides no assurances for compatibility. We strongly recommend thoroughly testing custom contracts to ensure compatibility with Immutable's ecosystem.
Verification - blue tick representing legitimacy
Immutable's asset verification process updates the Blockchain Data API with one of the following statuses for your ERC20, ERC721, or ERC1155 contract:
| Status | Description |
|---|---|
| Verified | Assets marked as 'Verified' have undergone registration by Immutable and have received a blue checkmark. See disclaimer below |
| Unverified | All ERC20, ERC721, and ERC1155 assets start in an 'unverified' state upon deployment to the zkEVM chain. This status does not imply malicious intent; rather, it indicates that the asset has not yet been inspected by Immutable. However, it is advisable for game studios to seek Verification from Immutable to receive the blue checkmark, as it enhances total traded volume by instilling additional confidence in transactions involving verified assets among players and traders. |
| Inactive | Assets classified as 'Inactive' have lost their utility value within a game. These assets may include test collections or items that were previously valuable but are no longer intended for player transactions. Some marketplaces may disregard Inactive assets, and transactions involving these assets will be accompanied by appropriate warnings in Passport to alert users of their inactive status. |
| SPAM | Assets labeled as 'SPAM' are those deployed with malicious intent to defraud or confuse players and traders. These assets are flagged as SPAM based on alerts from Immutable's monitoring tools or reports from the community. If deemed to lack legitimate Web3 value by Immutable, they are designated as SPAM. Certain marketplaces may disregard SPAM assets, and transactions involving them will feature strong warnings in Passport, advising users against completing the transaction. |
Disclaimer
Please note, the verification process performed by Immutable is confined to an assessment of an asset's authenticity for security and anti-fraud purposes. It is not a legal or regulatory assessment of an asset's design, features and/or characteristics, or indeed any other kind of assessment; you should seek independent legal advice on such matters. While Immutable takes all reasonable care in conducting verification reviews of in-game assets, to the maximum extent permitted by law, it will not be liable for any direct, indirect, incidental, special, consequential, or punitive damages arising out of or in connection with the verification process.
Once you've deployed your collection or token, Immutable recommends all games verify their asset contracts, as it enhances player and trader confidence in engaging with transactions involving verified assets. For detailed information about Immutable's asset verification procedures, please refer to this guide.
To verify your assets do the following:
- Link your ERC20, ERC721 and ERC1155 contract to your Immutable Hub account. This can be done in 2 ways:
- Deploy the contract from our Immutable Hub's factory
- Deploy the contract manually via the command line and link your contract via your hub account. Details can be found below for each contract type:
- ERC20
- ERC721 & ERC1155
- Verify your contract via Immutable's explorer. For more information on verifying your smart contract on Immutable's Explorer check out this guide.
- In Hub, navigate to your deployed collection and click on it to view the details. Click the
Verify with Immutablebutton located in the top right-hand corner.
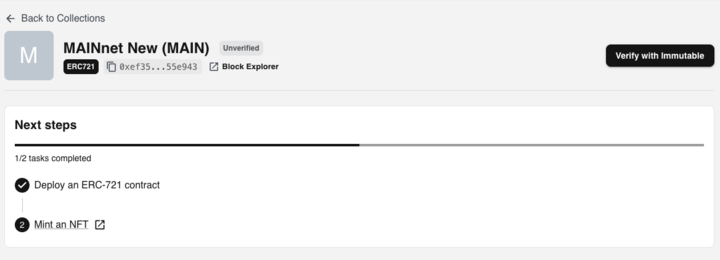
- Immutable will review your request and assign a verification status. Once this process is complete, your collection will display the assigned verification status.
If you deploy an erroneous collection on mainnet, please inform your Immutable account manager or notify us via Discord to have the collection labeled as Inactive. This status will indicate to your gaming community and marketplaces that the assets associated with this collection should be ignored.
Verification - source code
Verifying contracts makes their source code publicly available on block explorers like Etherscan or Immutable's Explorer.
It's important to note that verifying your contract's code is different from verifying an asset contract with Immutable. See the verification step above for details on verifying gaming assets.
Verify on Immutable's Explorer
To verify your contract on Immutable's Immutable's Explorer follow these steps:
- Deploy your smart contract to Immutable's zkEVM mainnet or testent
- Go to the following Immutable's Explorer pages for each environment:
- Link your wallet via the
Connect Walletbutton in the top right hand corner. Make sure you use the wallet that deployed the Contract - Enter the information required to verify your smart contracts code.
Verify on Etherscan
To verify your contract, you will need an Etherscan API key, which you can get from signing up on their website. Then you can add the API key to your Hardhat config file like so:
etherscan: {
  apiKey: <etherscan API key>,
},
You can then run the hardhat verify task, passing the address of the contract, the network where it's deployed, and the constructor arguments that were used to deploy it (if any):
npx hardhat verify --network mainnet DEPLOYED_CONTRACT_ADDRESS "Constructor argument 1"
If your contract has multiple constructor arguments like the preset ERC721, you will need to save your constructor arguments to a separate file like arguments.js in the root directory as so:
module.exports = [
  'string argument', // string arguments
  50, // numerical arguments
  { x: 10, y: 5 }, // struct arguments
  '0xabcdef', // bytes arguments
  '0x123567', // address arguments
];
The verification command then becomes:
npx hardhat verify --network mainnet DEPLOYED_CONTRACT_ADDRESS --constructor-args arguments.js
See the guide in the Hardhat docs for more information and other ways to verify your contract.